Techs can’t solve the problem that can’t be found

Service Writers: Don’t Leave Your Greatest Diag Tool in the Shop
read more
Techs can’t solve the problem that can’t be found
The oil change is supposed to be simple, right? And while the service guide is always your guide, there are a few things that pertain to servicing vehicles equipped with cartridge-style oil filters that aren’t always covered as well as they could be. Here’s a few tips on servicing them correctly that should be helpful for newer techs and a good reminder for more experienced mechanics.
This is especially true when dealing with filters located on top of the engine. They engage an anti-drainback valve when installed and draining the crankcase before removing the filter will allow the dirtiest oil in the engine right back into the crankcase! If not caught, it could result in an overfilled crankcase and will certainly contaminate any new, clean oil added.

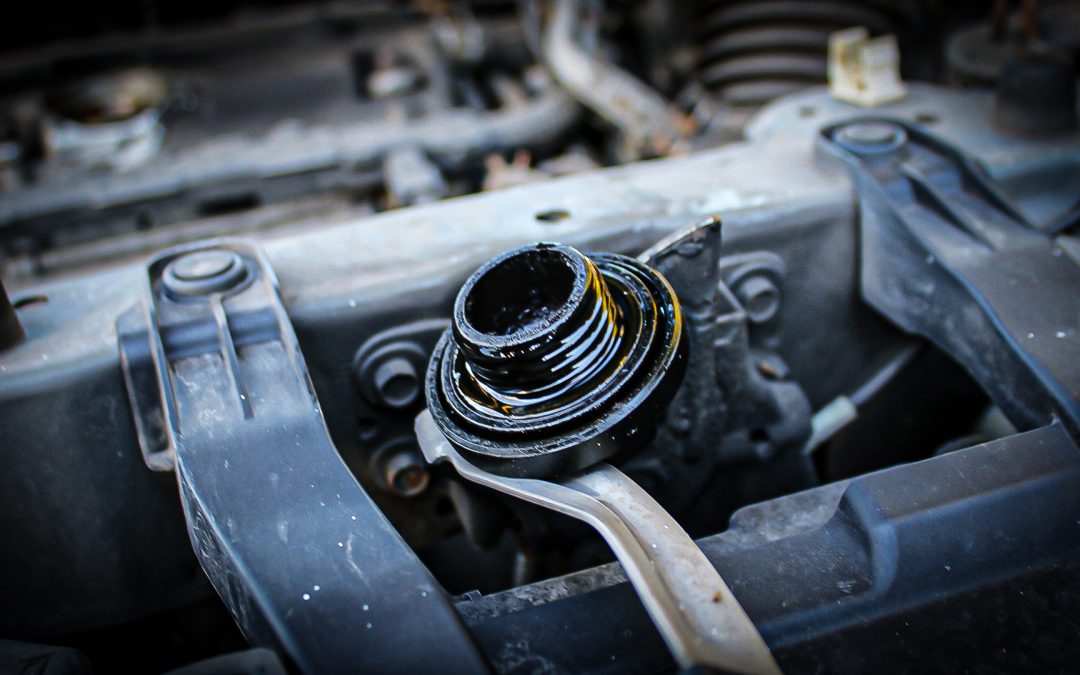
Always drain and remove a cartridge-style filter prior to draining the pan. Photo: Peter F Meier.
Tongue-and-groove pliers are not designed to remove the oil filter caps on cartridge filters. Use the right tool for the job to avoid damage to the cap or housing assembly. The tool will differ based on the car, but be assured tongue-and-groove pliers are always the wrong item. A small crack in either will lead to a big bill later.
With the filter cap removed, gently remove the O-ring(s) from the cap and note their location(s). Do not use a tool to remove the O-ring from the threaded portion of the cap. Clean the housing and cap and inspect carefully for any signs of damage. If in doubt, replace it.
On some designs, and on all spin-on filter designs, the sealing O-ring may be left behind on the engine when the filter is removed. Verify the seal has been removed with the filter to avoid accidentally installing the new seal on top of the old. Two rubber seals don’t seal at all, and it will only be a matter of time before the oil pressure in the engine blows all the oil out onto the pavement.

Make sure the new filter has everything you need, including the O-rings. Inspect the O-rings for defect prior to use. Photo: Peter F Meier.
Open the new filter package and compare the contents to the ones removed. Carefully inspect the new O-ring(s) for signs of damage. If any are noted, exchange the filter and its O-rings for a replacement.
And never reuse an O-ring! Lubricate the new O-ring(s) with clean motor oil. Gently roll the new cap O-ring down over the threads, making sure it is fully seated in its groove. Never attempt to stretch the O-ring over the cap. With the O-ring in place, install the remaining components into the cap and install in the housing. If you see that the O-ring is getting caught in the threads, do not attempt to use it—replace it.
Cartridge filter caps have specific torque specs. Using the proper tool and your torque wrench, tighten it to spec and complete your installation as outlined by the OEM procedure.
By following these tips when dealing with cartridge filters, you’re ensuring your shop delivers top-notch maintenance and best practices to your customers—exactly the reason they turn to you.
The articles and other content contained on this site may contain links to third party websites. By clicking them, you consent to Dorman’s Website Use Agreement.

They may look simple, but these little toggles can enable powerful electronic versatility.
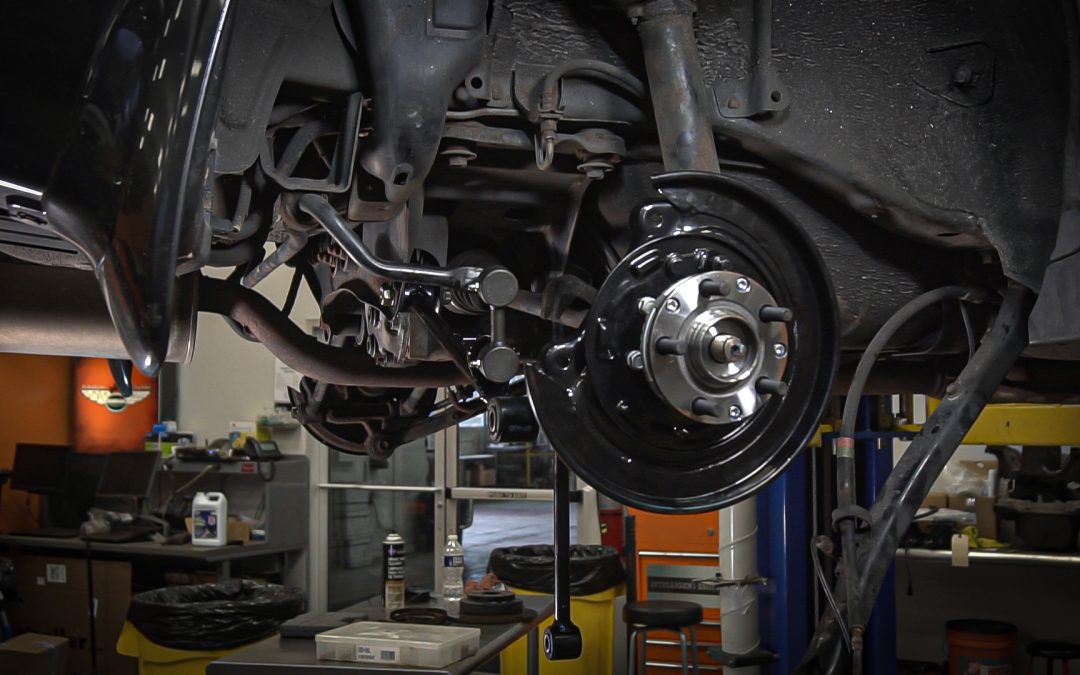
Loaded knuckles streamline wheel bearing and suspension repairs to help shops boost efficiency and profitability.
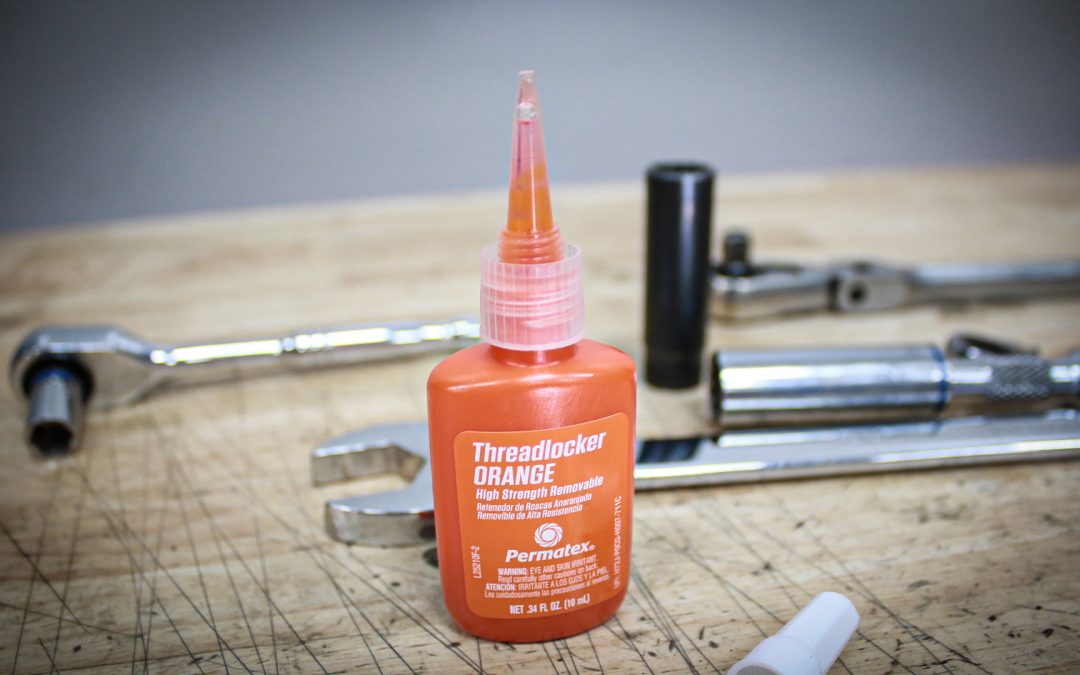
Can there be one threadlocker color to rule them all?
When it comes to threaded items, wrong is right. Or is it left?
To reach a successful diagnostic conclusion, you have to follow the right diagnostic path.
A bent dipstick and a broken oil cap are lucky indeed!
Participation in this forum is subject to Dorman’s Website Terms & Conditions. Please read our Comment Policy before commenting.