Maybe there’s a reason “upsell” has become a dirty word—and it might be your fault.

Service Writing Tip: Justify Your Recommendations
read more



Maybe there’s a reason “upsell” has become a dirty word—and it might be your fault.
If you see that line on a ticket and the make and model is a Blue Oval truck or van, what you have is likely related to the door latch. Specifically, the cable end that operates that latch has cracked and crumbled.
Ford will tell you to repair it by replacing the latch and cable assembly (or assemblies), because they don’t sell the cables separately. That’s punishingly expensive. The plastic-cable-end-design has been in place for 25 years, and it isn’t a great one. The issue is clear-cut: the polymer gets brittle, probably due to oil migration, heat cycling, use, drying lubricant that no longer lubricates, and just plain wear and tear.
So here are a few tips on repairing this incredibly common problem that affects Ford trucks and vans from the ‘90s right up to some pretty modern stuff. Some of this will be a little over your head if you’ve never done one, but once you’re in the door, it will become clearer, I promise.
Unfortunately, if you don’t know this problem is common and that the latches can be repaired, you’ll potentially price out a new latch and cable and resultant labor. Most parts countermen and catalogs don’t hip you to the fact that the easy and cheap method to get that door working normally is to repair what is already there.
Similarly, the repair process is not straightforward since the factory service manual doesn’t cover the repair process. You can use Google and YouTube to get your bearings, but if there’s a succinct guide to showing what to do and what not to do all in one spot, I’ve never seen it. At this point in the piece, I’d say you’re pretty much done with this step: you now know the symptom, the main two methods of repair, and the parts involved in making that door work again. After a little more reading, you’ll understand the repair (as opposed to the replacement). This is a supplement to what you already know or have researched. Step-by-steps exist, but even if you’ve done this before, this guide focuses on ways to get these latch repairs in and out of your bay faster if you don’t do them every day like this former Ford tech.
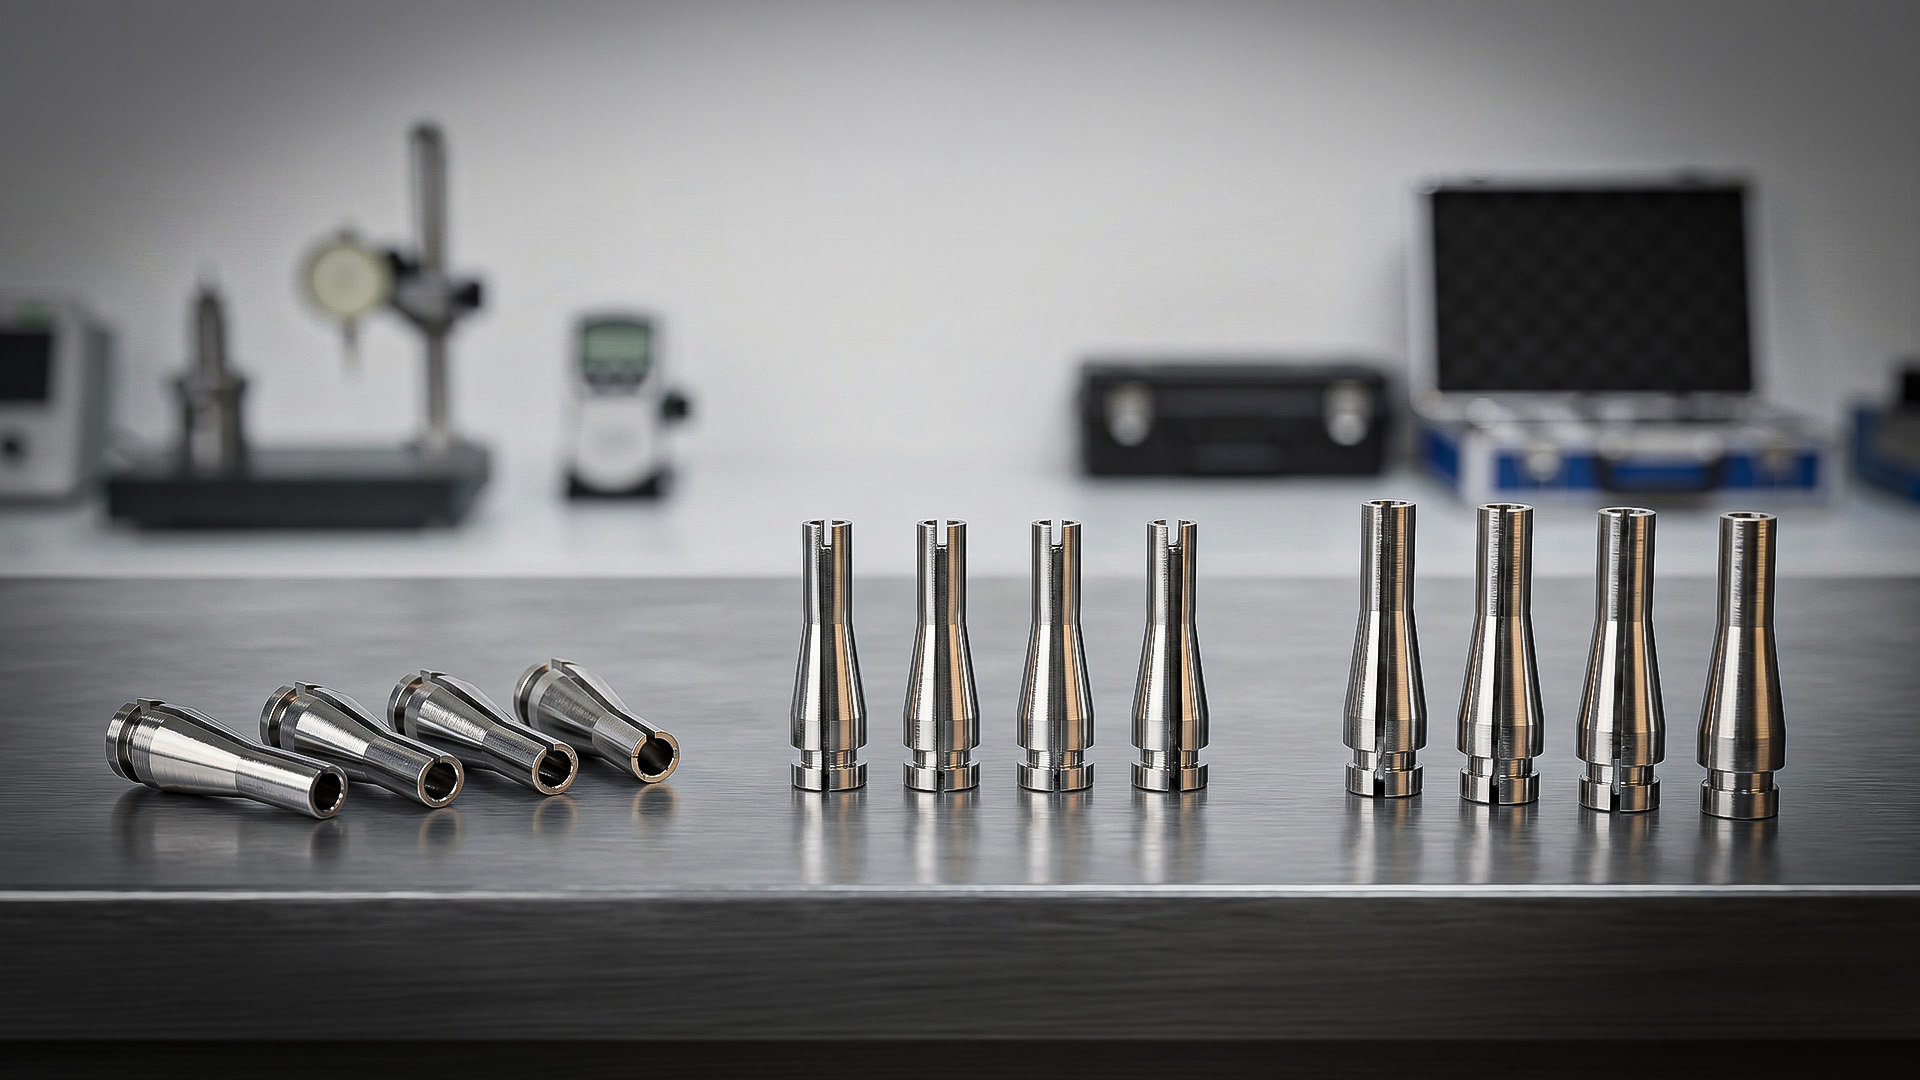
If one is gone, the others are right behind it. Especially in the case of a cab-and-a-half work truck with a broken passenger cable, make sure your writer sells the matching door. If you’re a solo worker with stuff behind the seat and the truck was just down to repair that right-side latch, how mad will you be when a few weeks later you’re walking around to that side over and over because the left just shot craps? It’s not if, but when. They all go bad, and they usually do so close together, chronologically speaking.
The 926-111 includes four cable ends for two cables, ultimately repairing one door. I’ve seen fruitcake piecemeal kits that don’t include the correct combo of 3+1 cable ends (more on that later). Sometimes there are two or ten or some other weird not-a-multiple-of-four amount. You need to order one 926-111 per door, not per vehicle or cable.
You’ve going to have to disassemble the door panel from inside the vehicle to open the door to work on it. In a work van on the back doors? No big deal. On a King Ranch with two-tone suede interior? Probably don’t wanna get that greasy.
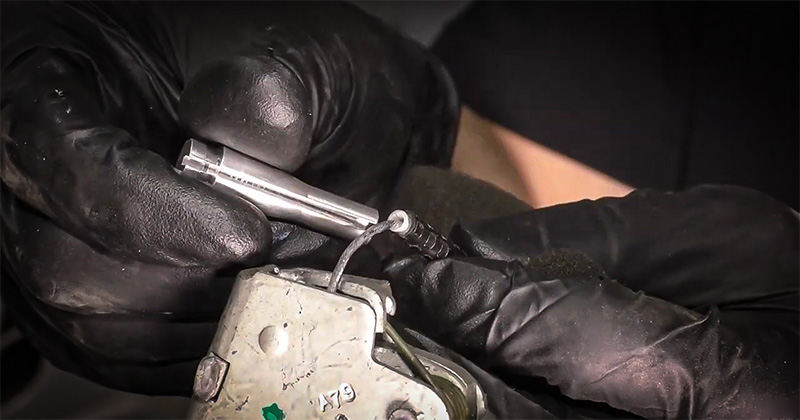
When first trying to get the door open so you can get out of the jump seats, put tension on both of the inner cables near where the ends are broken. Call the lube rack kid over for a third hand and have him pull the door handle and it should open; it probably won’t without some intervention on your part.
You can try to do this in situ. I’ve done it many times, but experience has shown this is not the best way. Like many things in this business, the additional time spent to free an assembly usually pays off in reduced time making the actual repair. I like to get the latches and cables out for a few reasons. Assessment is easier. You can clean gunk and lubricate where needed. But mostly, it’s just easier to make the repair with the latch and cable at the bench.
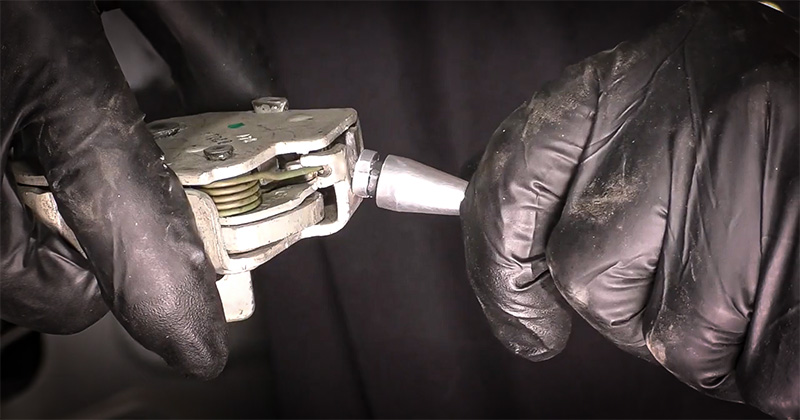
This is obvious, maybe, but there are some finer points to consider. You may find a need for a T50 bit if a seatbelt is in the way. That’s straightforward. Usually these latches are held in place with a wee-tiny button head bolt, and most of them I’ve seen require a T27 star socket. If you’re a pro, you probably have multiples, but for home gamers, you might wanna make sure these are on-hand before you rip the door panel apart. A T27 is not a part of every “standard” set of star tools, and a T50 may be outside the realm of the larger ones you own.
I think a 3/8” T27 hex bit makes the most sense here to crack these free. Don’t rely on a 1/4” drive, or worse, a driver. Ford used an unholy amount of blue threadlocker on the fasteners, and they don’t give up easily. Ford is also fond of using bolts with heads that accept tools that I believe are chronically undersized. Putting the spurs to a T27 is already taxing the limits of that tool. Having a nice bit of leverage from a 3/8” ratchet is going to make it easier for you to get it loose without damaging that fastener, and also to apply that force in a nice, smooth, controlled way. “Herky-jerky” here may be thought of as “strippy-slippy” because that’s what the outcome will be.
If you read the previous step and said, “Soften that stuff into goo with the blue-tip wrench!” well… don’t. Doors are painted and paint doesn’t like heat. The door you’re working on contains lots of stuff that doesn’t like heat, and weatherstripping is often nearby, and that’s not fond of being roasted either.
Just get by without it. If you must attempt using heat, I’d urge you to start with a heat gun and not an open flame, but the risk outweighs the reward for either in my book.
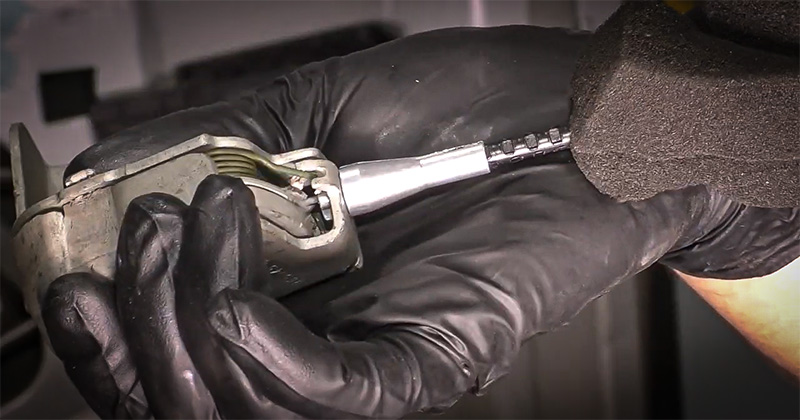
Remember that earlier “3+1” comment? Look at your new aluminum ends in the 926-111 box. They’re not all the same. See how there’s that one weirdo? That one has to go in the right spot. You can probably figure it out if you have to, but often when the ends you’re pulling out are destroyed, it’s hard to know what goes where.
Ford made this kind of easy. I suppose the supplier did this for ease of assembly ID, but it also helps us fix these things: the cable ends are color-coded. The three “same” ends are black. The weirdo is white. Or, by the time you see it, somewhere between ivory and brown. But it’s noticeably different.
Note that that different one needs to be preassembled: put it into the latch and then turn it so it can’t pop back out. Feed it into the door carefully so you don’t face a comeback.
The ends of the cables are ribbed to try to retain the ends. Slicing them off with a razor carefully is the move to get the old junk out of the way; it’ll crack and crumble and you want clean ends. I generally lay the outer housing against the repair end and mark it so I know how deep the cable needs to sit to be bottomed out. If you have good eyes you can sometimes see this area through the slot cut in the repair piece to gauge if you’ve driven the end in far enough.
I usually hold the new cable end in a vise and push the housing into it until I feel it bottom or I see my mark land in the right spot. Pulling the housing into the new end is tempting and intuitive, but invites bent or damaged cables. Remember, the housing for a bowden-type cable like this one is coiled specifically because the inner cable that’s pulled “pushes” the housing by compressing it. Being pushed against is what the outer sheathing was quite literally made to do.
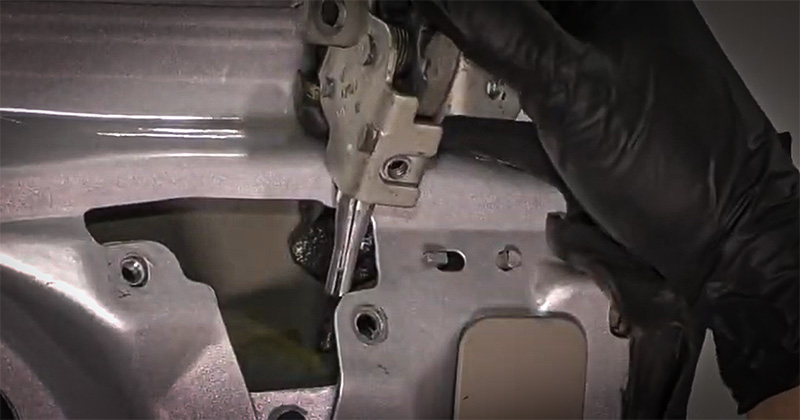
Make note of where the cable adjuster sits in the little clamshell holder. You can “tighten” the cables to remove excess freeplay by turning that cheesy plastic affair, but that’s a recipe for breaking an old item that wasn’t even strong when new. Since you’re opening the clamshell anyway, you can just manually place the cable where you want it with zero worry of breakage.
Note where it sits when you disassemble it. When I pull these apart, the adjusting screw is almost always dead center; I don’t think these are adjusted on the line. I think that the center is close enough and they just build in a little adjustment for later, or as I think of it, “now.”
To tighten the cable, set the screw so that the large part where the cable enters sits slightly farther away from the latch it actuates. This just pulls some slop out of the cable; there was probably a bit even from new, and if it stretched slightly, this is the shortcut to having the vehicle owner come back and say, “It hasn’t worked this well since I bought it!”
And obviously, test that this all functions before reassembly. You should do that even if you aren’t using my cheater’s method of cable adjustment. If you’re slow at work the day you’re doing this job, doing this will give you the opportunity to try several adjustments and give you a feel for how much feels good. You can totally overdo it and have hair-trigger latches and that’s no good.
That should see you through to the end of the job. Coupled with a more traditional step-by-step, you should be able to knock these out of the park. It’s easy work that pays well, and because of the cost delta between repairing this part and replacing it (with the same part and the same silly problem!) is so great, customers always leave smiling. Because you know how to deal with this job, now, you will be, too.
The articles and other content contained on this site may contain links to third party websites. By clicking them, you consent to Dorman’s Website Use Agreement.
Don’t waste time with jumbled electrical connectors under the hood.

Keeping track of small parts during a job can be tricky, but there’s a cheap and effective way to solve that problem.
Cross-threading or stripping a fastener can bring progress to a halt in an instant. Start by hand-threading fasteners.
Every car you touch is full of it, but it’s not in any service manual. Here’s the working tech’s guide to plasticizers: why plastic goes soft, sticky, chalky, and cracked, what actually happens when you hit trim with a torch, and why your customer’s dash keeps fogging the windshield.

Ever get up to your elbows in a diagnostic problem, only to wind up right where you started an hour later?
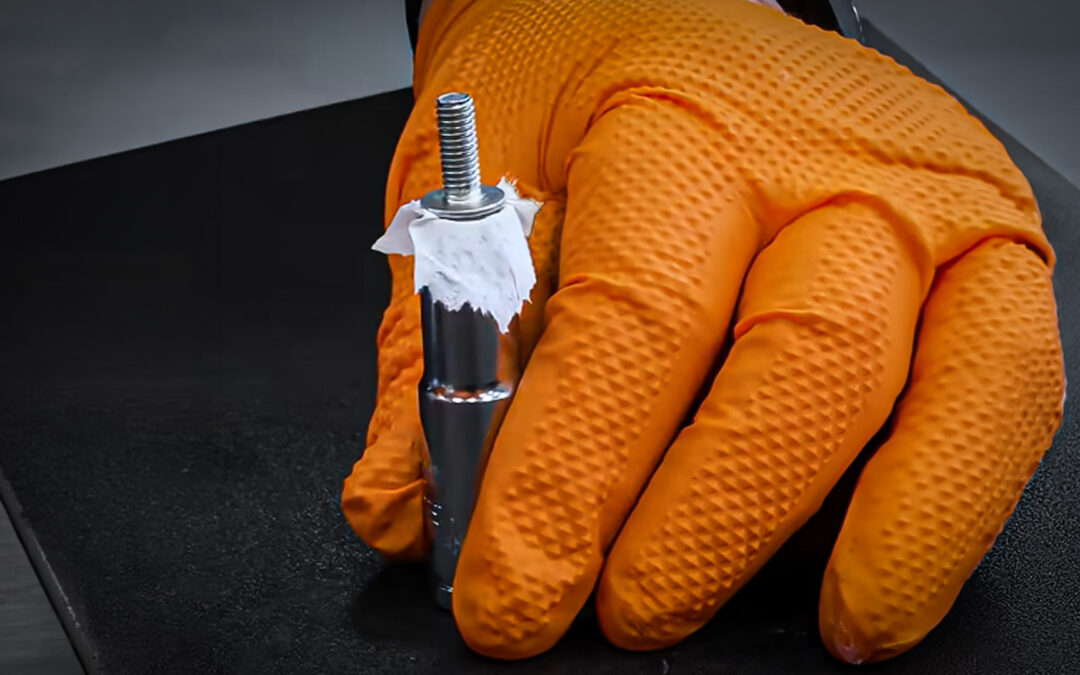
Having trouble hanging onto a nut or bolt with a socket?
Participation in this forum is subject to Dorman’s Website Terms & Conditions. Please read our Comment Policy before commenting.